- 1Log in to the GiveEasy platform
- 2On the side menu navigation, go to ‘My Appeals’ > ‘Appeal Analytics’
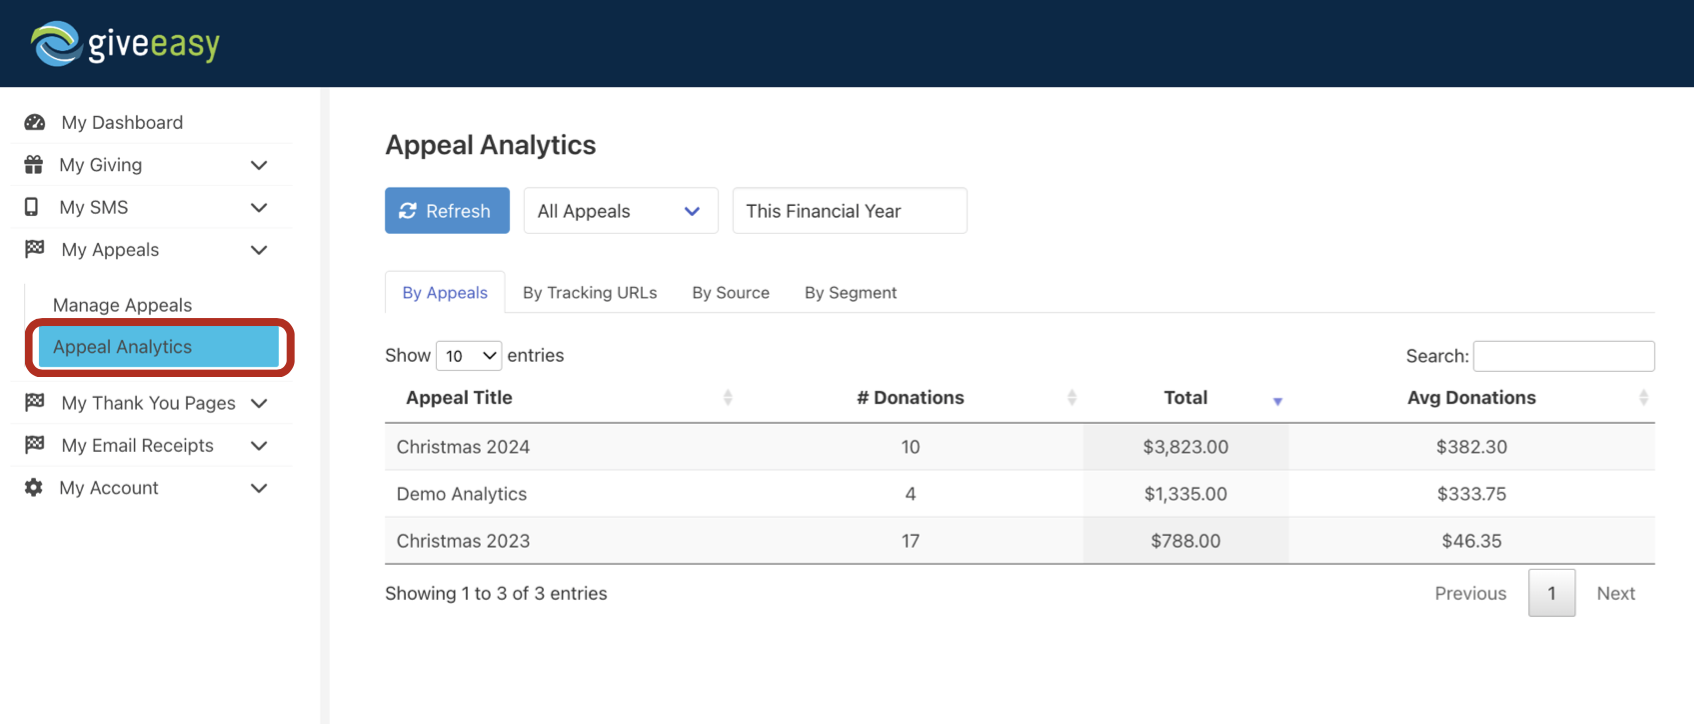
There are three ways in which you can filter the data viewed in your analytics dashboard:
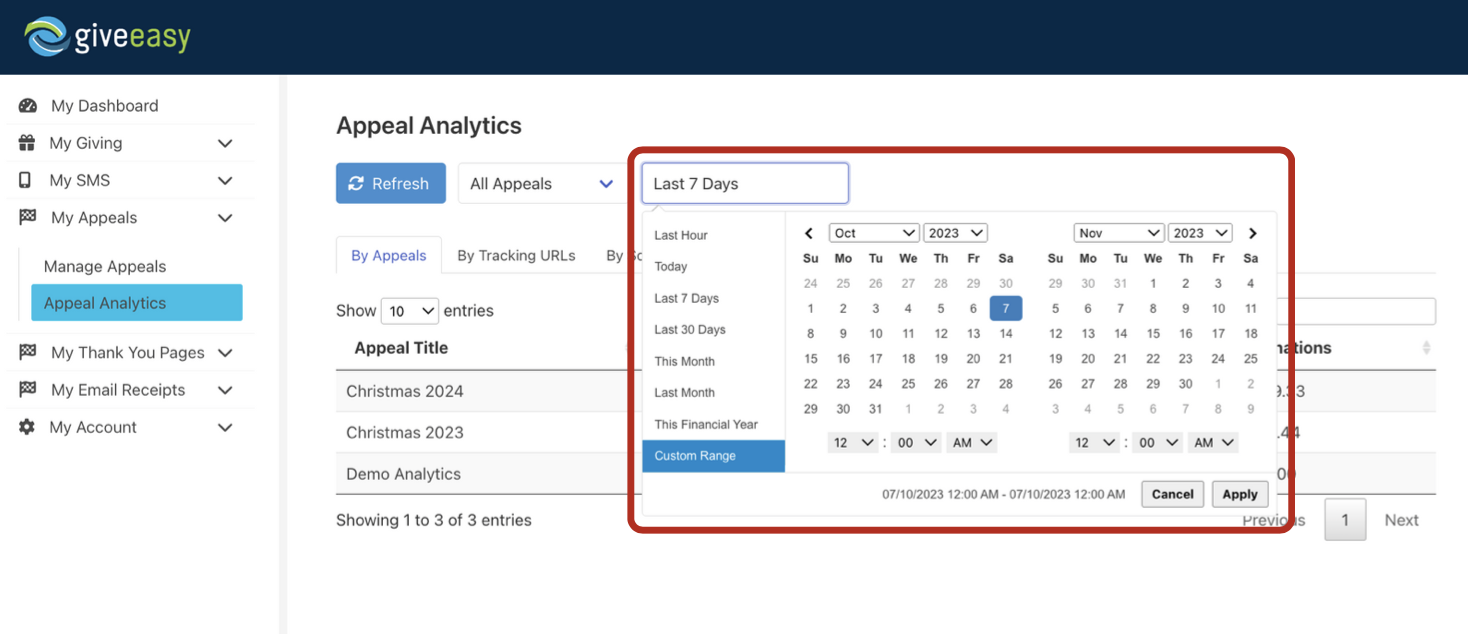
- 1Filter by time period
Here you have the option to filter data to only show results in the:
- Last hour
- Today
- Last 7 days
- Last 30 days
- This Month
- Last Month
- This Financial Year
- Custom Range
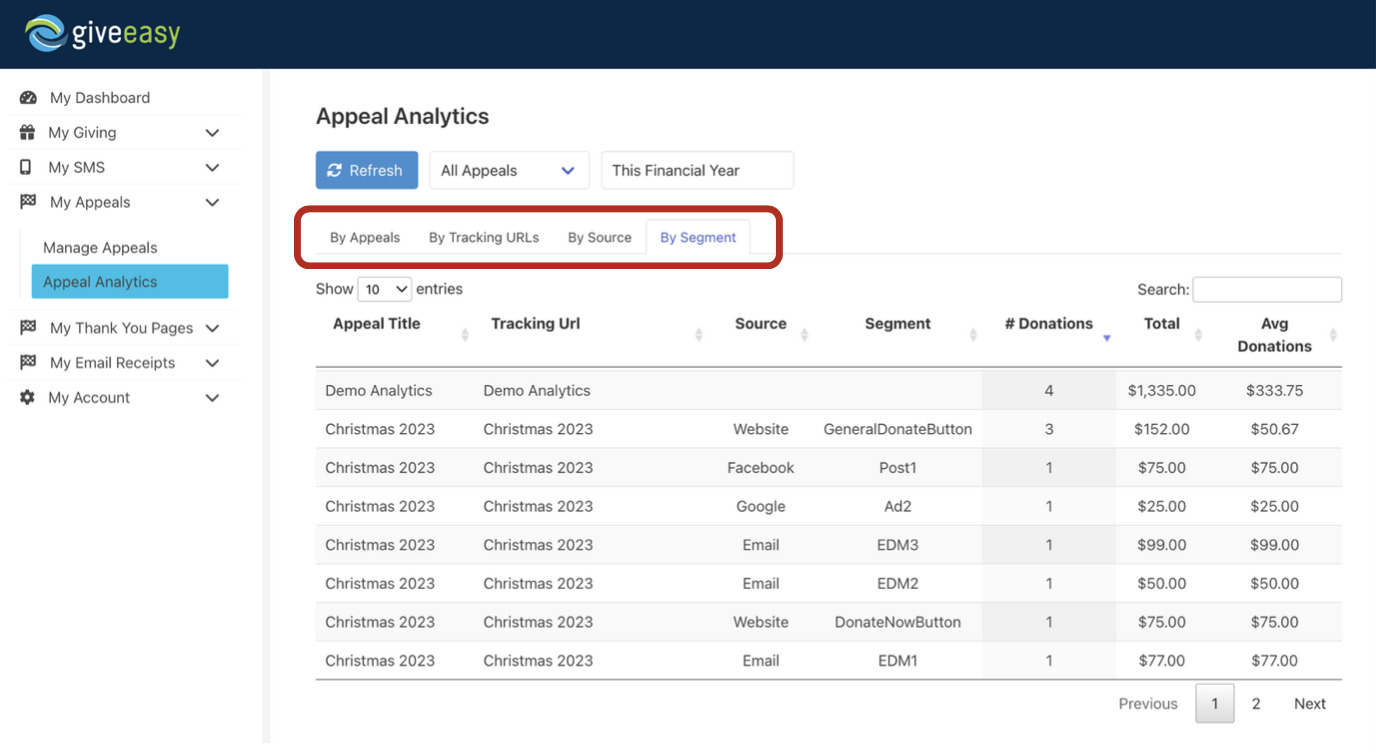
- 2Filter by data level (by appeal/ tracking URL/ source/ segment)
Underneath the time period filter you have the ability to include and filter by data levels. This will allow you to go more granular with your data, including:
- By Appeal
- By Tracking URL
- By Source
- By Segment
- 3Filter by appeal name/ search
If you are searching for a specific appeal then you can also filter by the appeal name by selecting the ‘All Appeals’ dropdown and changing this to the relevant appeal you wish to view. You can also use the search field to filter your data to a specific appeal, tracking URL, source or segment.
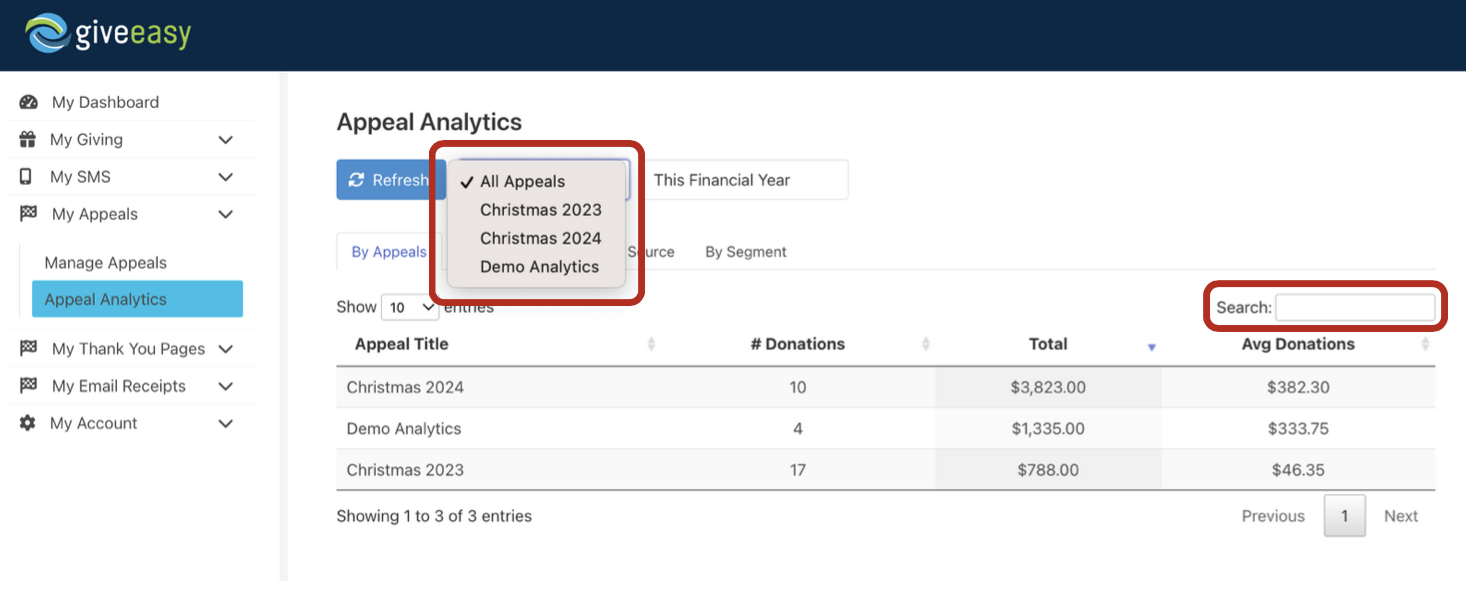
Please note the search function will only filter through the table data listed, not all data there is. For example, if you have the ‘last hour’ time filter on and are searching for an old appeal title that hasn’t received a donation within the last hour it will not appear.
While you do not need to use the ‘Source’ or ‘Segment’ options on the analytics dashboard they do allow you to get more granular with your reporting.
In order to see data via source and segment in your analytics dashboard you will need to set up hidden fields for ‘source’ and ‘segment’ in your donation form. To do this all you need to do is:
- 1Log in to the GiveEasy platform and navigate to My Appeals > Manage Appeals and click edit on the relevant donation page to launch the page editor.
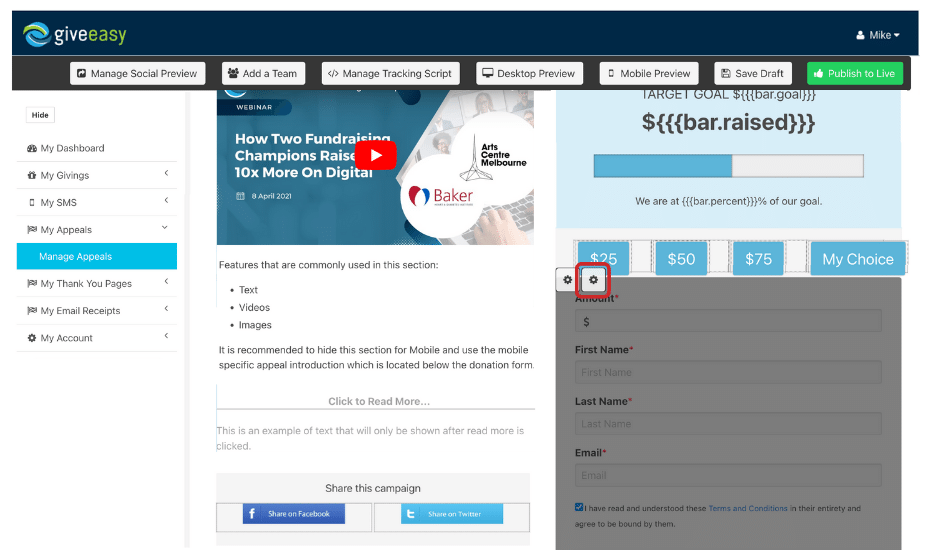
- 2Once in the page editor hover over the donation form. You will see two settings cogs appear in the top left hand corner. Click the settings cog on the right hand side like seen below.
- 3The following pop up will appear with all the key donation form settings. Under the ‘Add A Custom Field’ select text from the dropdown options and set the display name as “Source”.
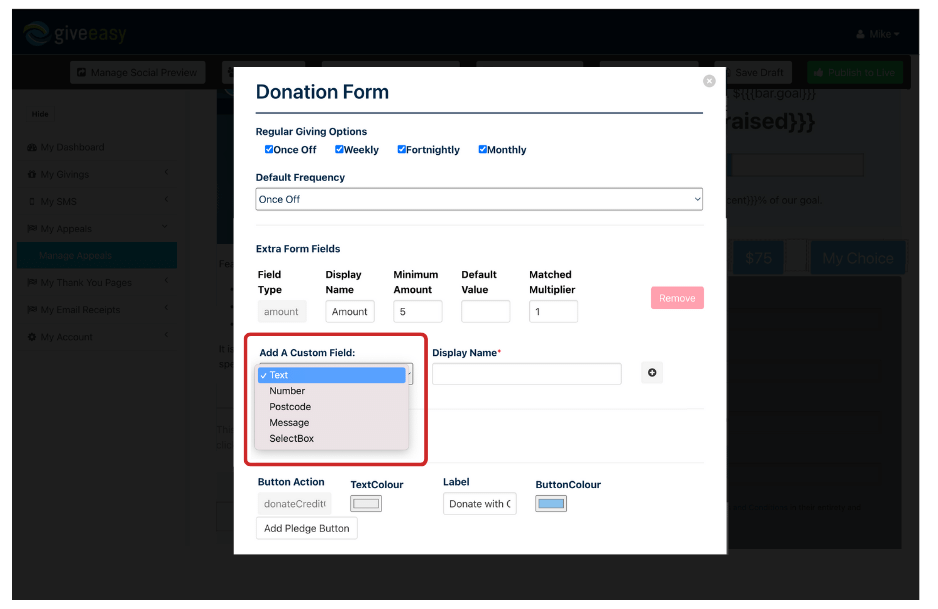
- 4Click the plus button beside to add this new field to your donation form

- 5Once this new field has been added tick the ‘Hidden’ field option.

- 6Repeat this process again to add another custom field for segment, making sure you set the display name for this as “Segment”.
Please be aware that if these hidden fields are not added to your page’s donation form with the display name set exactly as “Source” and “Segment” the data will not pull through to the analytics dashboard.
- 7Once you have added these fields click the close X button on the pop up. Your changes will be automatically saved.
As with all hidden fields these new fields will not show on your donation form to your supporters but will be captured in the back end when processing the donation.
- 8Finally, when you go to use / share your donation page URL across different channels all you need to do is add "?custom_source=xxx" after your donation page’s normal URL (with xxx being what you wish to name the source type) to capture the source. For example: https://example-charity.giveeasy.org/christmas-2023?custom_source=Facebook
To capture both source and segment the all you need to do is add
"?custom_source=xxx&custom_segment=XXX" after your donation page’s normal URL. For example: https://example-charity.giveeasy.org/christmas-2023?custom_source=Facebook&custom_segment=Post1
Please note as this is a URL the name of your source or segment cannot contain spaces.
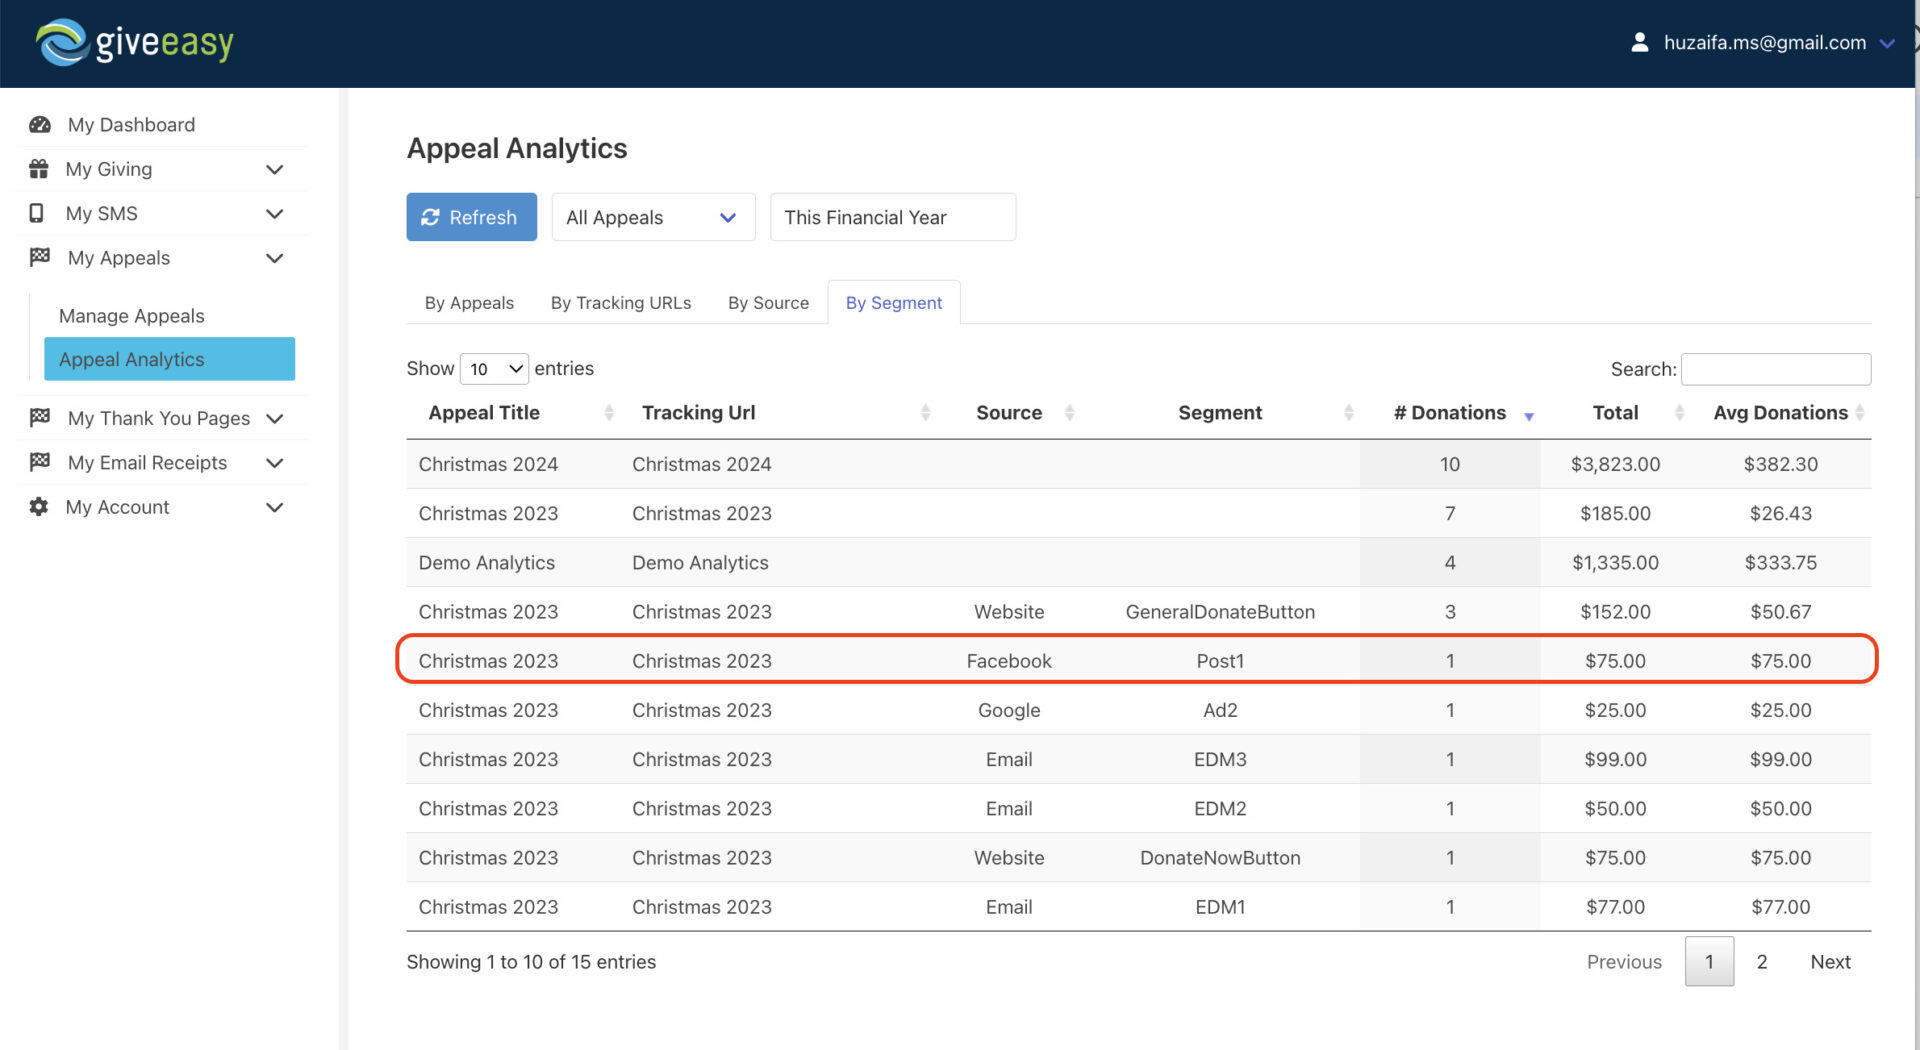
When a donation is made via this URL, you will see the source as “Facebook” and segment as “Post1” in the analytics dashboard.
If you are using personalised URLS (PURLs) please get in touch at support@giveeasy.org and we will sort this part for you.
- 1Log in to the GiveEasy platform from your mobile phone
- 2Once you are logged in you will be automatically taken to the analytics dashboard
